Creating Formatted Sendouts and Branded Resumes with 1Staff
Formatted Sendouts (often referred to as branded resumes or blind resumes) can not only speed up your time to submit and improve fill ratios, but they provide your customer with a more consistent, branded experience. The downside is they can also be time consuming to create and maintain. 1Staff changes that by letting your recruiters create them as needed in Microsoft Word.

1Staff powered by Dynamics 365 allows you to:
- Create unlimited sendout/branded resume documents with custom logos and colors
- Have recruiters design them in Word without IT assistance
- Automatically attach key onboarding and compliance documents to them (such as a license, certification, or other onboarding document)
Let’s walk through a step-by-step guide to create a Personal Document Template in Dynamics 365 CRM to create a branded resume.
We will also highlight some tips and tricks for creating tables of data in Microsoft Word from 1:N entities

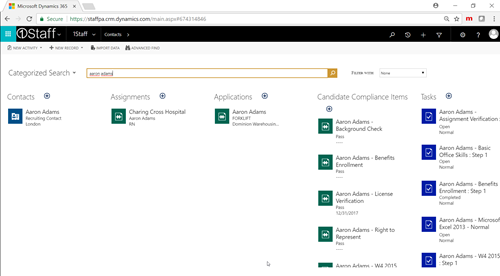
Step 1: Identify Your Profile
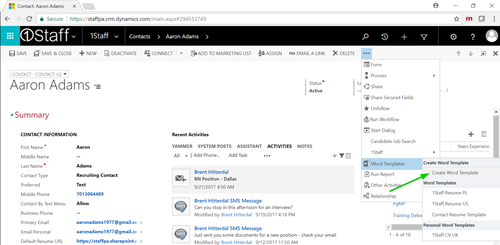
In Dynamics 365 just open any Contact record in your system. In this case we are doing a search for “Aaron Adams” to pull up one of our candidates.
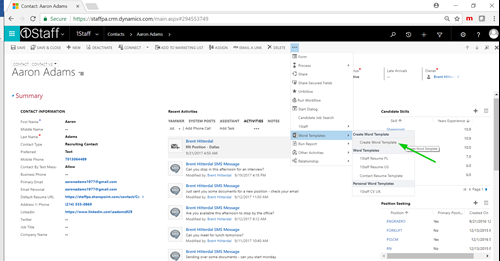
Step 2: Select Template
In the Contact entity select Create Word Template:
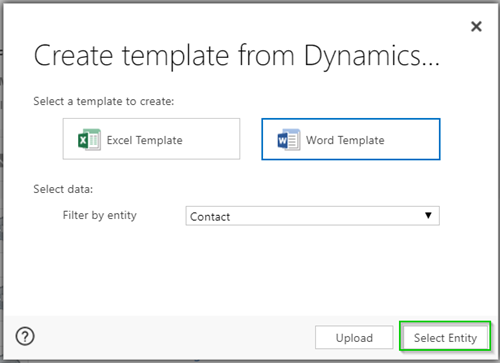
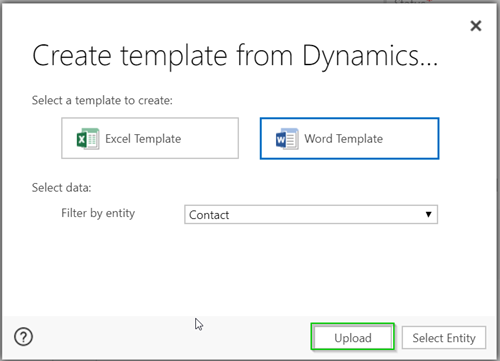
Step 3: Select Entity
Since you are on the Contact already the system defaults Word Template as well as Contact so you can just press the Select Entity Button:
Step 4: Additional Data
In the next screen you want to select the other Entities that contain data you want to include in your document. Usually the items you want are either included in your main entity or part of a 1:N relationship. In this case we are relating these to custom entities in 1Staff for Candidate Skills, Employment History, and Licenses and Certifications.
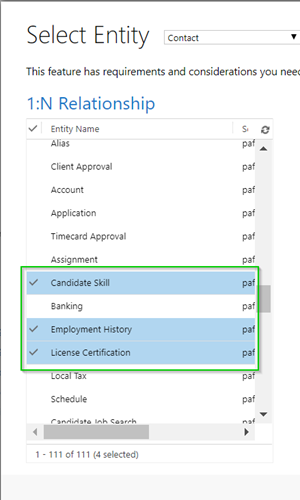
This data would ordinarily be populated from the 1Staff resume or CV parser or could have been created and verified as part of Onboarding and Compliance.
Note: The other more commonly used relationship on this screen is the N:1 relationship. That is used when you want to pull data for another Entity. As an example, the Candidate (Contact) record has a Zip/Postal Code. You can use that relationship to go back to that entity and include information like the county they live in or the geo-coordinates.
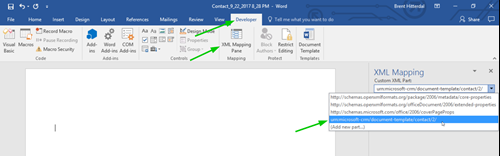
Step 5: Developer Tab
This is going to open Microsoft Word where you can:
- Select the Developer Tab (If you don’t have a Developer tab (how do I add the developer tab in Microsoft Word?)
- Push the XML Mapping button
- Select the new Contact item which should be the last item on the list
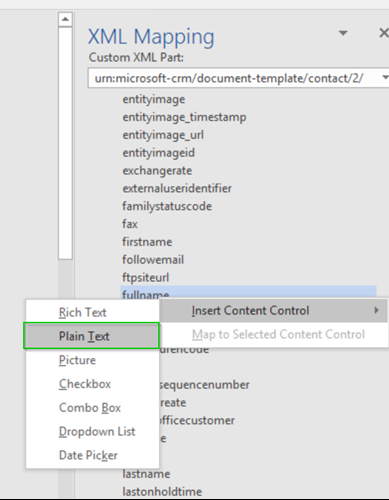
Step 6: Adding Fields
Adding fields to the Dynamics 365 Document Template
From here you select the fields from the XML Mapping area to add and make sure to:
- Right click on the field
- Select Insert Content Control
- Select Plain Text
Important Tip:
Important Notes Tips and Tricks:
- As you are working save versions of the template so you can roll back to an older version if needed
- In this example we are going to include some identifying information from the Contact/Candidate record. If you want to a Blind Resume or Sendout you would simply not add those fields to the document.
- If you want to add multiple fields to the same line add spaces or other characters to the line beforehand so you can insert new items with a space already inserted between the new item and existing items.
Example: Do you want to add multiple fields to one line? (ex. “City, State Zip”)
- Place the space and the comma on the line prior to adding the fields.
- Add the fields by placing the cursor where you want the field inserted
- When new fields are added as with the State or Province field, there is a buffer between the fields which makes them easier to work with.
With those tips and tricks you can continue to add fields as required.
From here we will move on to adding related lists of items to the document. This can be a bit trickier and there are a few things to be aware of when adding 1:N entities to a Dynamics 365 Document Template for 1Staff.
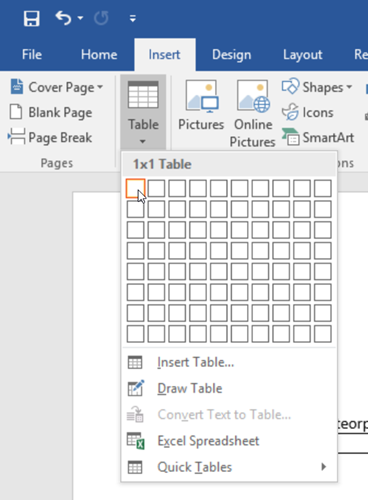
Step 7: Adding Tables (1:N) Relationships to a Dynamics 365 Document Template
First Select Insert>Table>1X1 Table.
You may be saying “I have 5 fields I want to add so I want to add 5 columns to the table” which is fine. In this case I want to format this document a bit differently and include multiple rows in a single Word table cell.
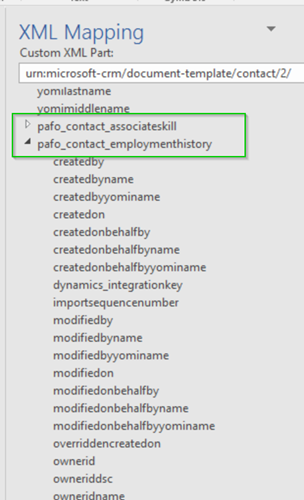
Step 8: XML Mapping
In the XML Mapping pane the 1:N entities (again an example may be wanting to list out all of the Invoices for a document you are creating for a customer) will be at the very bottom. In this case we want to add Employment History items and will expand the Employment History.
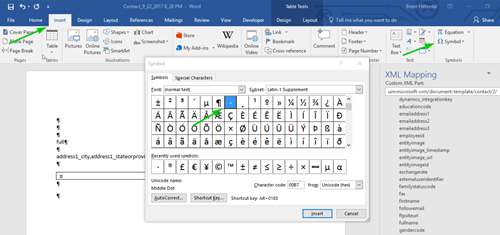
Step 9: Symbols and Characters
For my Sendout (Resume or CV) document I want to include some characters between my fields. Go to Insert>Symbol>More Symbols and select “·” or insert whatever character you want to use several times.
Step 10:
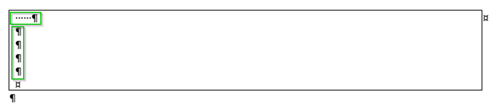
VERY IMPORTANT: Prior to adding any fields to the Word table make sure to add not only several characters on any line where you want to enter data, but also use the Enter key to enter multiple Carriage Returns into the cell as well.
trust us – it will save you some headaches if you want to change things later
If you use the Show/Hide button on the Home menu item Word will display hidden characters so you can see them on the screen.
Step 11: Formatting
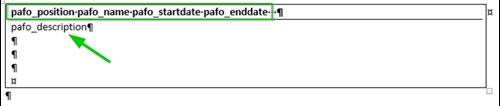
Continue to insert fields as required onto the first line being careful to keep a character such as a space, hyphen, or the “·” character we used here between each field.
In this example we also Bolded the first line using the normal Bold feature in Word as well as underlined it using the Borders button also on the Word Home menu.
Move your cursor to the second line and insert any fields you would like to include on the second row. Add a third row or other data as needed.
As you will see when we generate this document using a single cell in a table can provide greater formatting flexibility when you want to display multiple rows of data.
Step 12: Data Directions
IMPORTANT STEP: We have included the data in a table, but we now need to let Dynamics 365/1Staff know what we want the data in this table to repeat. In your case again you may be using a different custom entity, but if you want all of the values to repeat in your table you need to set the values to repeat.
To do this
Continue to format your document and add additional fields, sections, and formatting as required using the features of Microsoft Word. Some other items to review:
- Remove any extra characters or spaces from the document you don’t require
- Add any logos, address, boilerplate text, etc. to the header and footer of the document
- The standard table formatting of the tables includes lines around each cell/table. To remove borders, you can right click on table then go to Table Properties, press the Borders and Shading button, then on the top left select None.
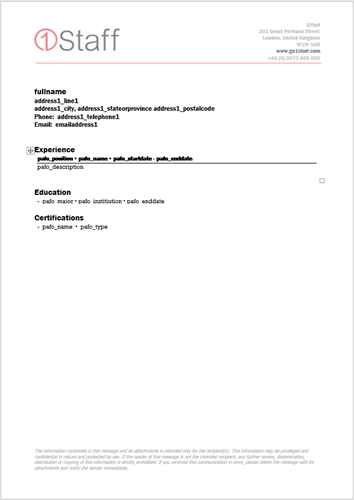
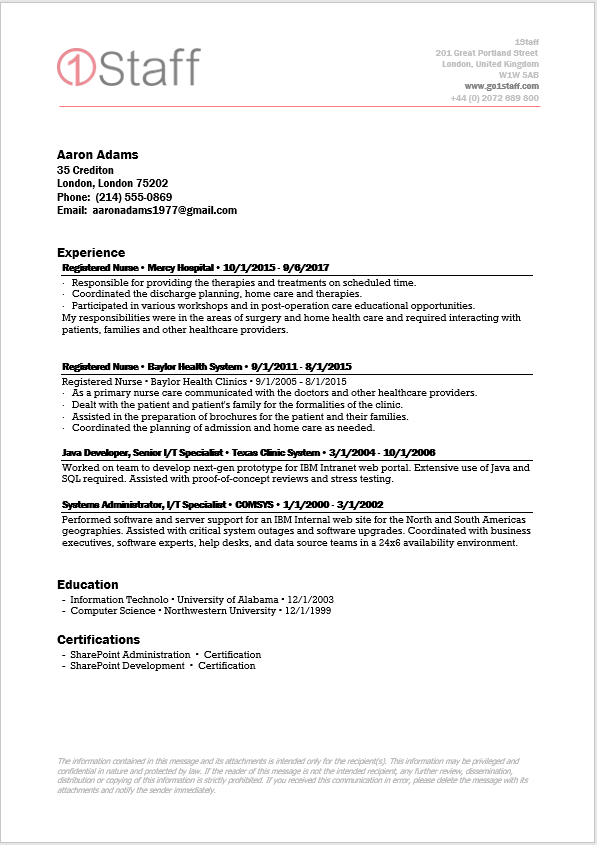
Step 13: Completed Document Template
When you are finished your document should look something like this. Contact Professional Advantage for some sample Word Document Templates to get you started.
Step 14: Save the Template
Save your template in a secure location so you can edit and upload it again as required (if your documents are similar it is easier to start from an existing template than to create one from scratch each time). Make note of where you save it because in the next step you will need to upload it. Then go to back to the Contact records and select Create Word Template.
Step 15: Upload the Template
Now you will want to select to Upload the Word Document Template you just created:
Step 16: The Completed Document
The Word Document Template should generate you a Sendout Document that looks something like this. You can use all of the standard features in Word to add whatever new fonts, styles, and graphics you would like to the document.
Learn more about 1Staff Staffing Software today!
If you’d like to find out more or talk to a specialist get in touch today.
Professional Advantage Managed Services
Want to find out more information on how Professional Advantage can help you with your security needs?
Please contact us to start your discussion about how our Managed Services team can help